

I started a little tradition during my last cold that inspired todays DIY tutorial. When my sniffles first started to surface, I made myself a quick hanky out of our bleige silk noil (soon to be retired, by the way) scrap fabric and embroidered some simple roses on it. I thought it would be cute to embroider more flowers on it every time I get a cold. Sort of funny looking back (perhaps the fog of the impending cold was setting in), but I think I’ll stick to it! So today I wanted to show you how to embroider your own flowers on our recently launched zero waste hankies! You can do this on any fabric…think a vintage backpack, sweatshirt or denim shirt!
tools needed
1. fabric to embroider on (might I suggest one of our hankies made from scraps?)
2. embroidery floss (available online and in craft stores, but I recommend picking some up at Fancy Tiger Crafts if you’re in Denver)
3. scissors
4. hand sewing needles
5. water soluble fabric marker (optional, but recommend for embroidery newbies)
6. an embroidery hoop (optional, but recommend for embroidery newbies)
7. an iron

how to embroider flowers
1 - Iron your hanky so that you have a nice wrinkle-free slate to work with.
2 - Cut a length of embroidery thread about 13” long. You don’t want to use too long of a thread because it can get tangled easily. There are six strands of embroidery thread in a single length of floss and we’re going to separate out three of them to use for the flowers. You can play with how many threads to use depending on how chunky or delicate you want your flowers to be. When you’re separating the threads out, sometimes things get tangled. Go slow and be patient and you’ll get it! Use your finger or a pair of scissors to separate out the threads.

here I am separating out 3 threads of the 6 thread embroidery floss

use your finger or your scissors to separate out the threads. go slow as it’s easy to tangle.
3 - Thread your needle and tie a knot at the end. You’ll have one end of your embroidery floss hanging a few inches below the needle eye and the other end is knotted. Set aside.
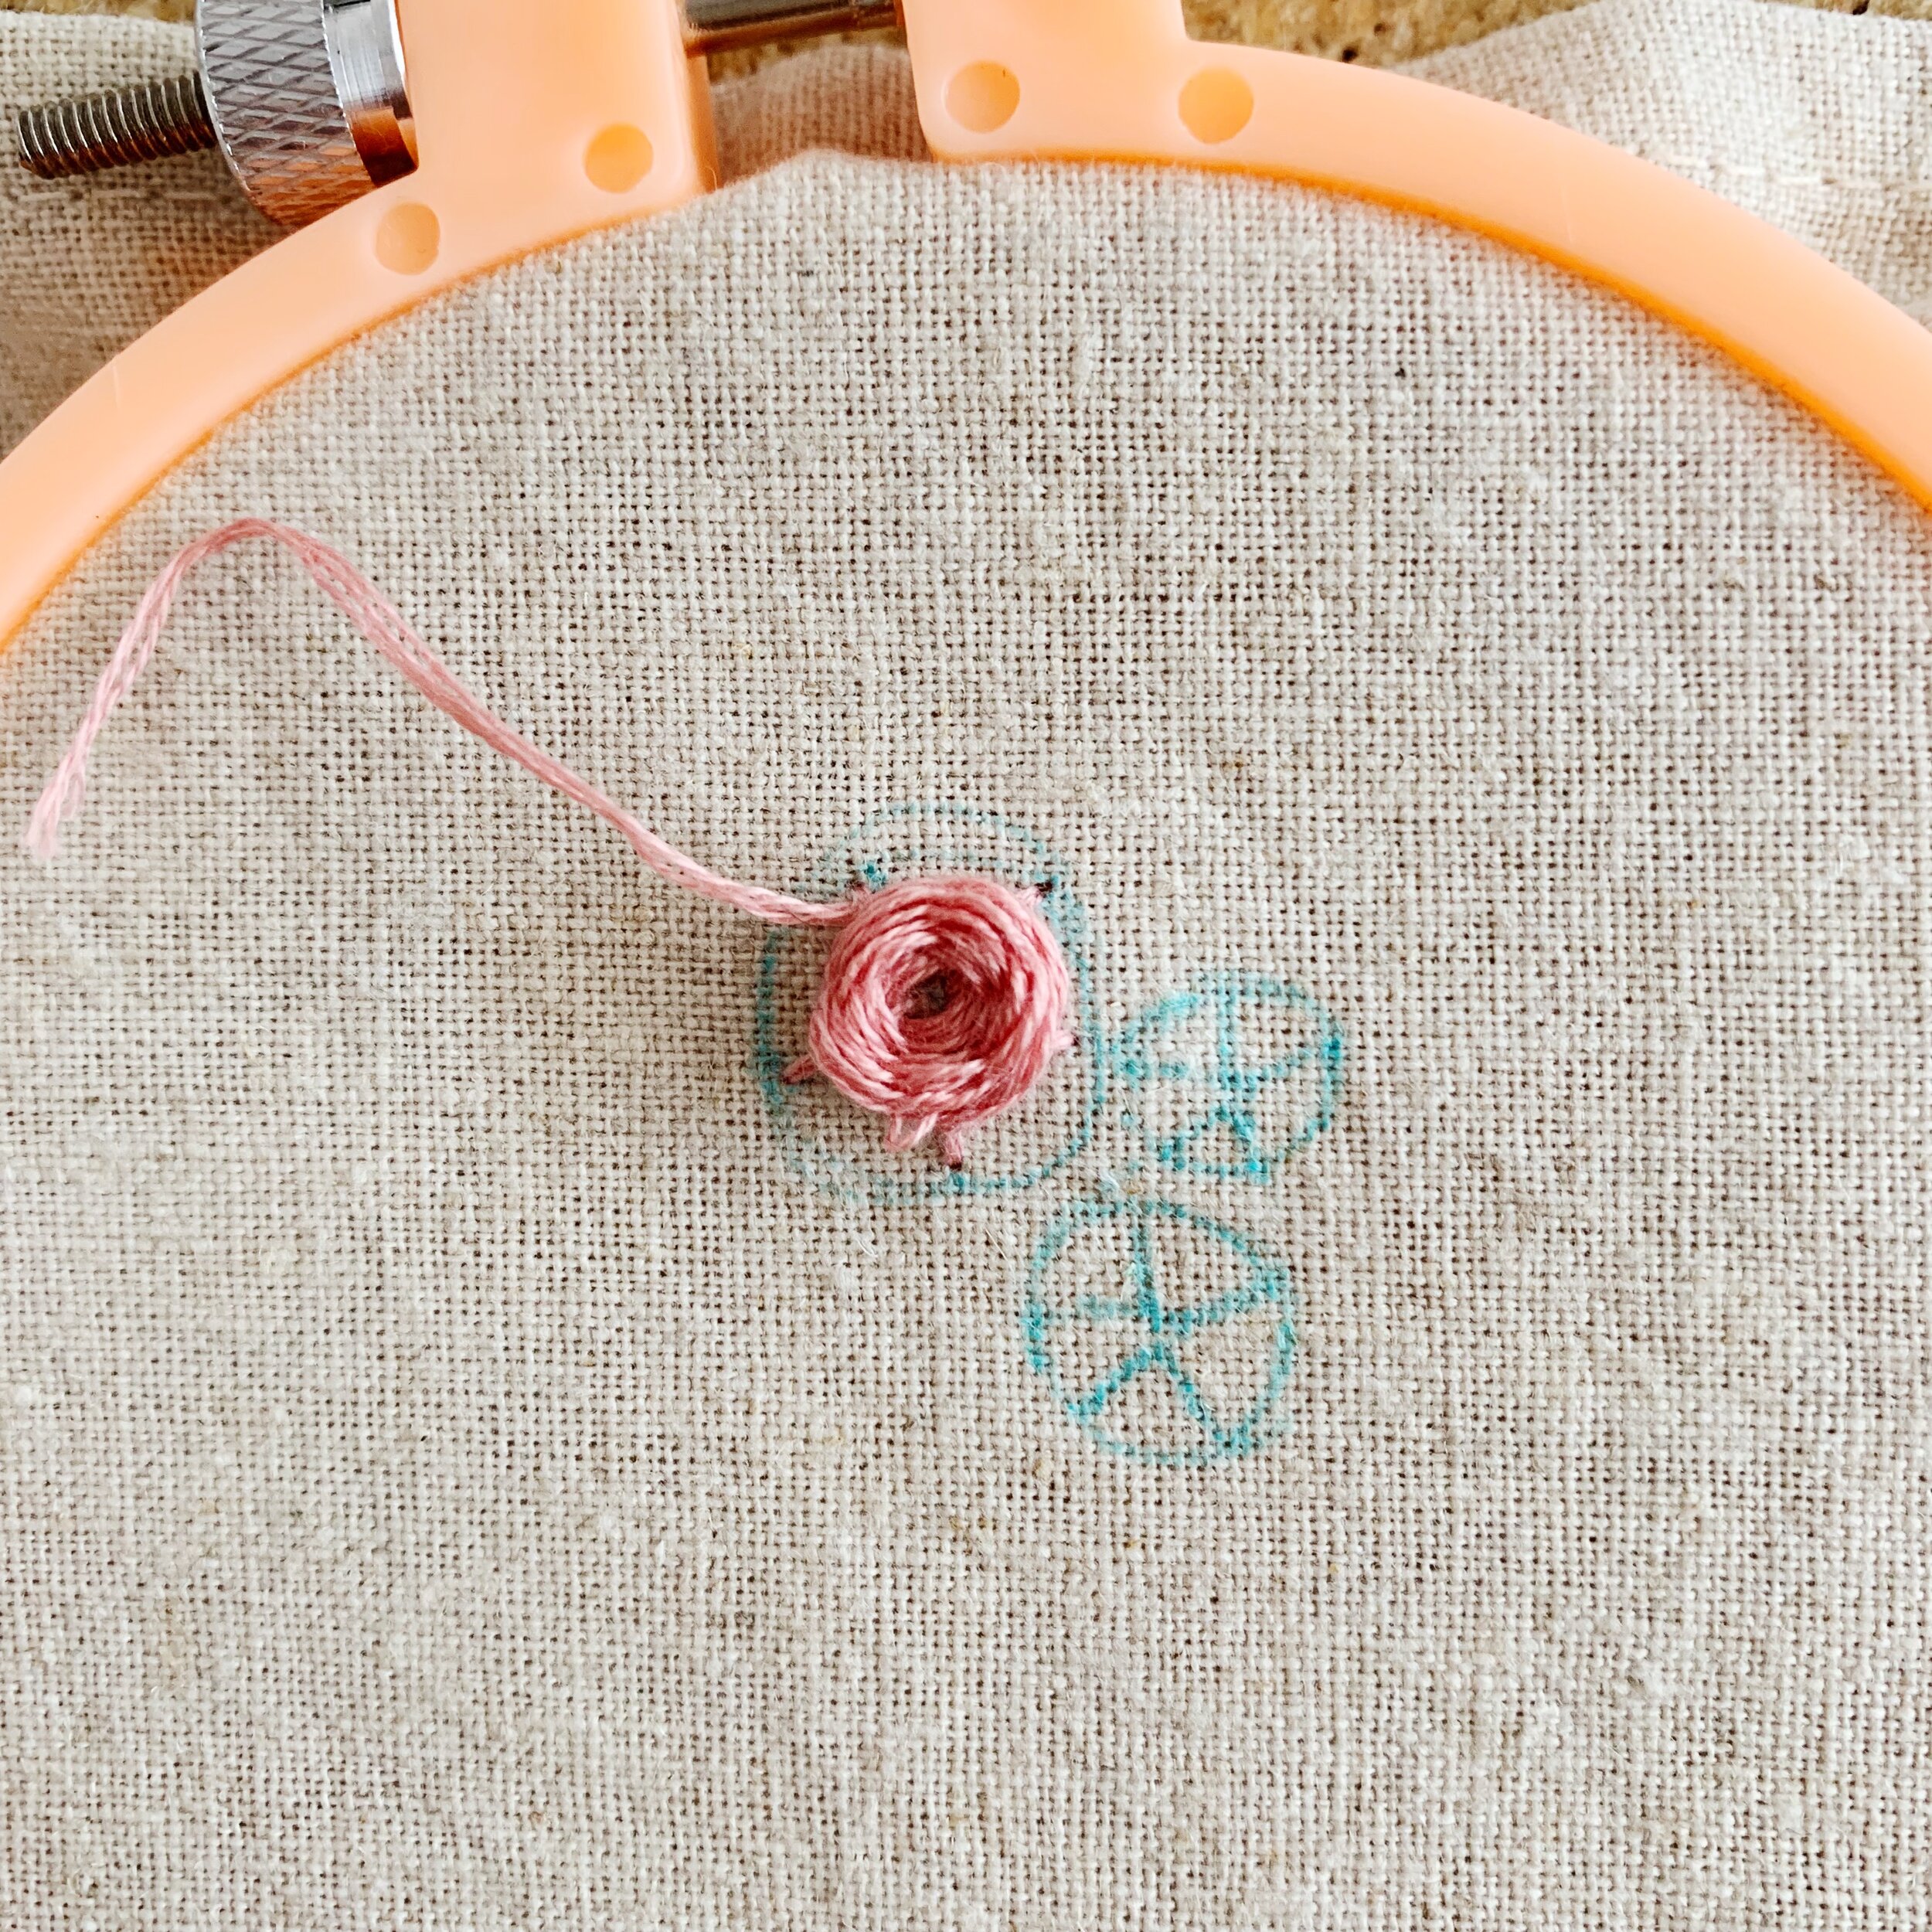
4 - This is a great step for beginners. I like to draw my design with a water soluble fabric pen. When you’re done with your embroidery, you can use a little bit of water to remove it the ink. We’re going to be drawing a wheel shape, so a circle with five “spokes.” You want an odd number of spokes and I like to group a few wheels together in different sizes for visual interest.

5 - Affix your embroidery hoop to the fabric by placing the smaller circle underneath your drawn design and then place the larger circle on top and tighten it. The keeps the fabric nice and taut while you work.

6 - Take your needle and thread and come up through the center of one of your wheels from the back. Take the needle across one of your wheel spokes and down through the fabric. Continue until all the spokes are embroidered over.


7 - Now you’re going to do some weaving. Come up with your needle through the fabric near the center of the wheel in-between two spokes. You will go over the first spoke and under the next.

8 - Continue all the way around while alternating between going over and under each spoke. Don’t pull too tight. You’ll now start to see your flower grow.
9 - If you run out of embroidery floss and you want your flower to be fuller, simply bring the thread to the back of the fabric and tie a knot. Begin the same steps above with a fresh length of thread. If you’re satisfied with your flower, bring the thread to the back and tie a secure knot. Trim the excess thread.
10 - Repeat the above steps with different colored floss with your other wheels. I went rogue and bunched my flowers closer together than my original drawing. When you’re done, dampen a cloth and dab the ink so that it disappears. Remove your embroidery hoop and press your hanky once more and voila! Your next cold with be slightly cheerier. Imagine how many flowers you could get on there after many, many years of colds! Your ancestors will surely treasure your beautiful snot rag.


diy not your thing? you can also purchase this already embroidered hanky here.